WP Social Importer

WP Social Importer is a wordpress plugin that imports news from Facebook, Instagram, Twitter into your website. This plugin transforms automatically the news from your social networks into wordpress posts.
You can download the plugin from the official wordpress repository!
UPDATE: recentelly Facebook changed its API (due to the scandal) and now I am working to update it.
The Instagram and Twitter importers work correctly.
The content of the news will automatically be processed: links, hash-tags and people you mention in the news will be converted into real links. The main picture of your news will be set as a featured image on the wordpress post.
You can also set the categories, tags and post-type you want to associate with the posts you are importing.
Following you can find tutorials to set up the:
First of all we have to create a Facebook app in order to create an App ID and an App Secret that is required from the importer.
How to create a Facebook app
1) Login to facebook developers: https://developers.facebook.com/apps/
2) Create a new app clicking on Add a new App
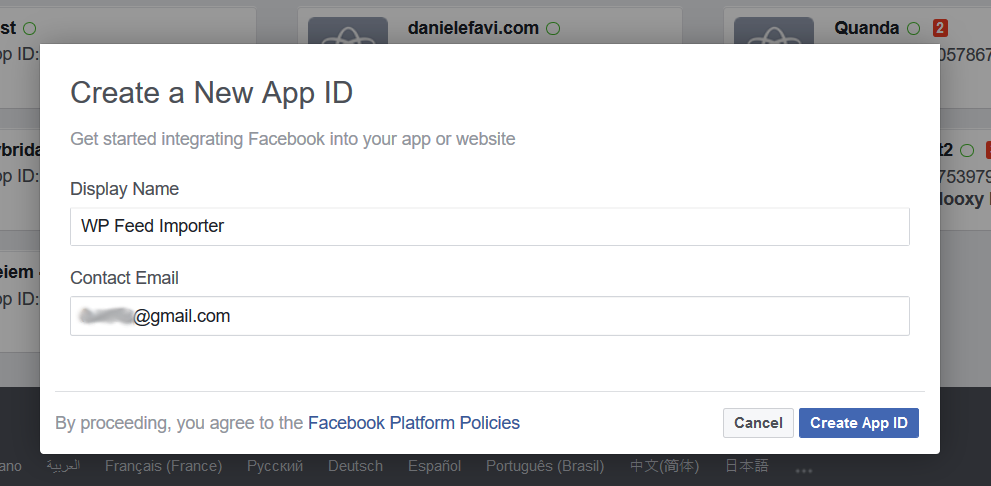
3) Choose a name for your app. In my case WP Feed Importer And then press Create App ID button.
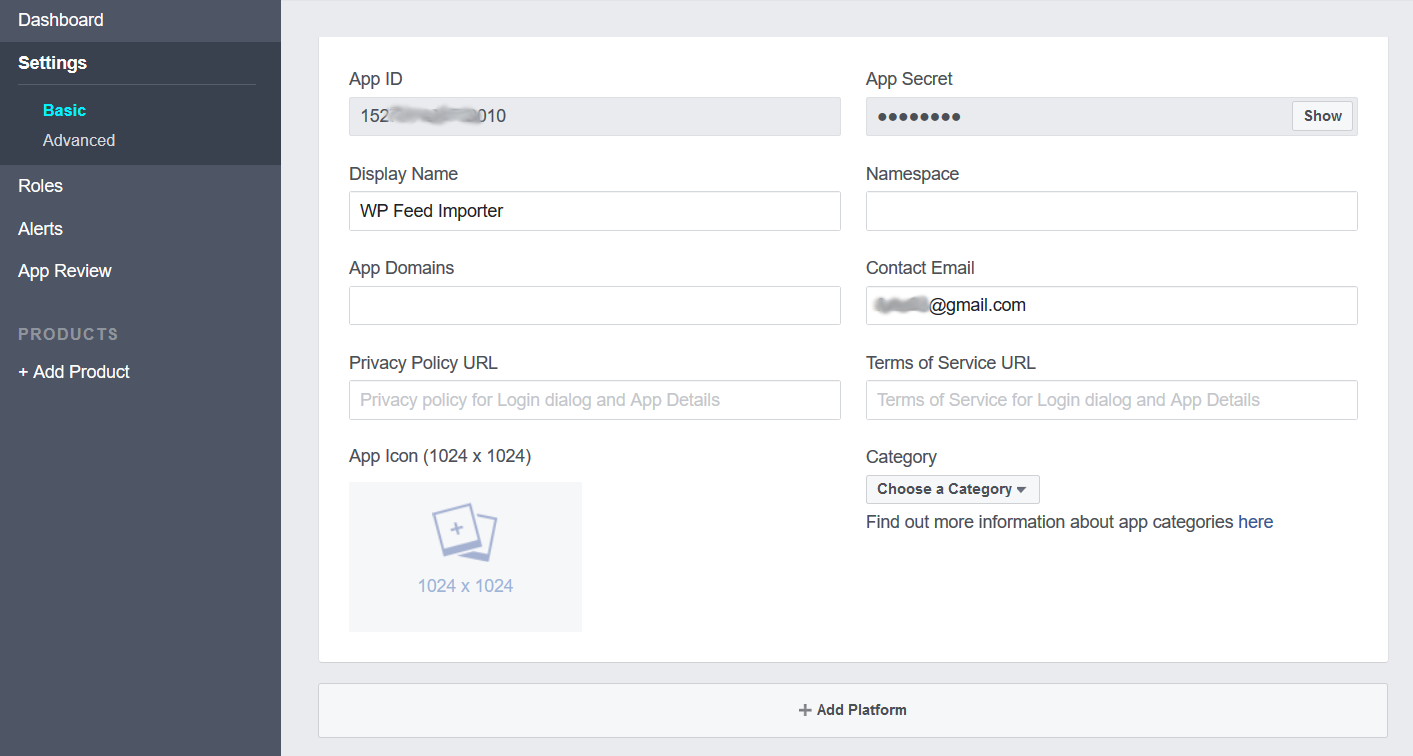
4) From the left menu click on Settings > Basic and on the page that will appear click Add new platform at the bottom of the page
5) On the dialog box choose Website. Then insert the URL of your website, in this tutorial example it is http://localhost/wp-test/ and press the button Save Changes

6) Copy the App ID and App Secret, you will need them for the importer settings.
The setup of the Facebook App is completed. Now let’s set up the Facebook account on the WP Social Importer plugin.
Facebook settings for WP Social Importer
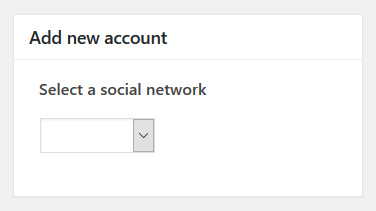
7) Go to your website and login into the wordpress administration. Click on Social Importer on the left menu. On the importer page you will see a box on the top-right Add new account; in that box in Select a social network type section choose Facebook from the dropdown menu.
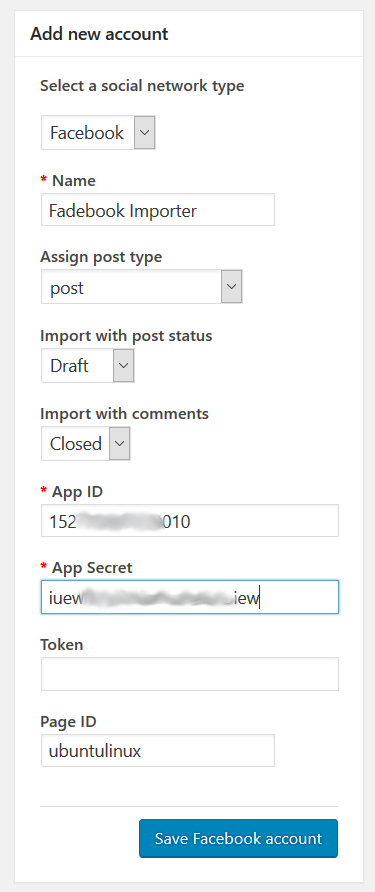
Fill in all the required fields and make sure that the Page ID has a valid page name or page ID. Then click the button Save Facebook Account
First we have to create an Instagram app in order to create a Client ID and a Client Secret that is required from the importer.
How to create an Instagram app
1) Go to https://www.instagram.com/developer/ and click on Manage Clients from the menu on the top.
2) Click on the button Register a New Client

3) Fill in all the required fields as shown in the picture below.
NOTE: it is important that you fill in the field Valid redirect URIs with the proper wordpress administration home URI path adding /wp-admin/admin.php to your URL.
For example http://www.yourwebsite.com/wp-admin/admin.php; if you are testing this plugin locally http://localhost/your-folder/wp-admin/admin.php
If the URI is wrong you will get the error OAuthException – 400 – Redirect URI does not match registered redirect URI
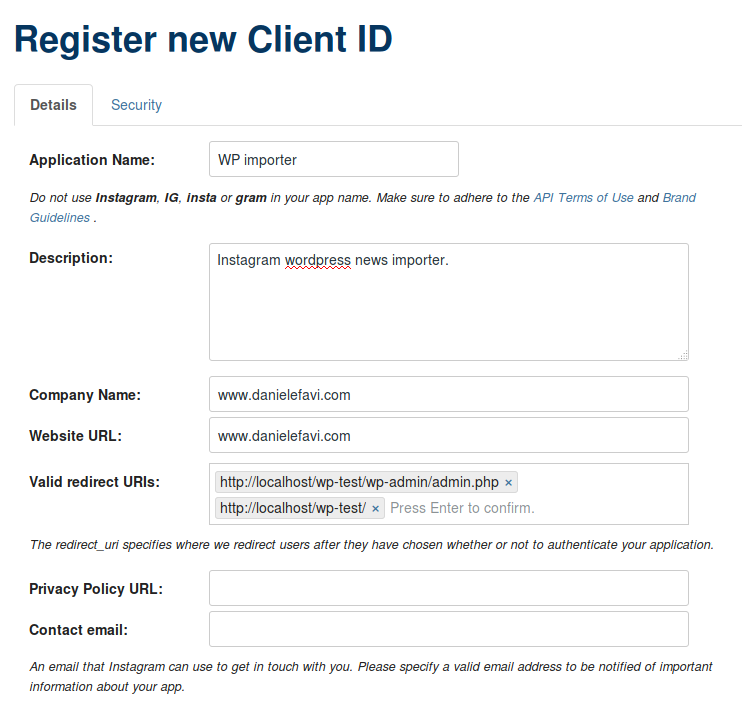
4) Click on the tab Security and make sure that both Disable implicit OAuth and Enforce signed requests are unchecked. Then press the button Register
5) Now your Instagram web app is set! Click on the Manage button of the app you have just created.
Then copy the Client ID and Client Secret


Instagram settings for WP Social Importer
6) Now open your website and go to the wordpress administration; then click on the link Social Importer on the left menu.
7) On the importer page you will see the box Add new account on the top-right: there from the Select a social network type section choose Instagram from the dropdown menu.
Give a name to the account and fill in Client ID and Client Secret with the Instagram web app you have just created and then click on the button Save Instagram Account

8) Once saved you will see your new account in the list: click IMPORT

9) On the page that will appear there will be an error message: this is because we still have not granted the permission. So just click on the button Get Instagram Token

Then you will be redirected to an Instagram page where you have to press the button Authorize

And you are ready to import your Instagram news!
First we have to create a Twitter app in order to create the API Key and an API Secret required from the importer.
How to create a Twitter app
1) Go to https://apps.twitter.com to set the Twitter app and click on the button Create New App
2) Fill in all the required fields as shown on the image and click the button Create your Twitter application
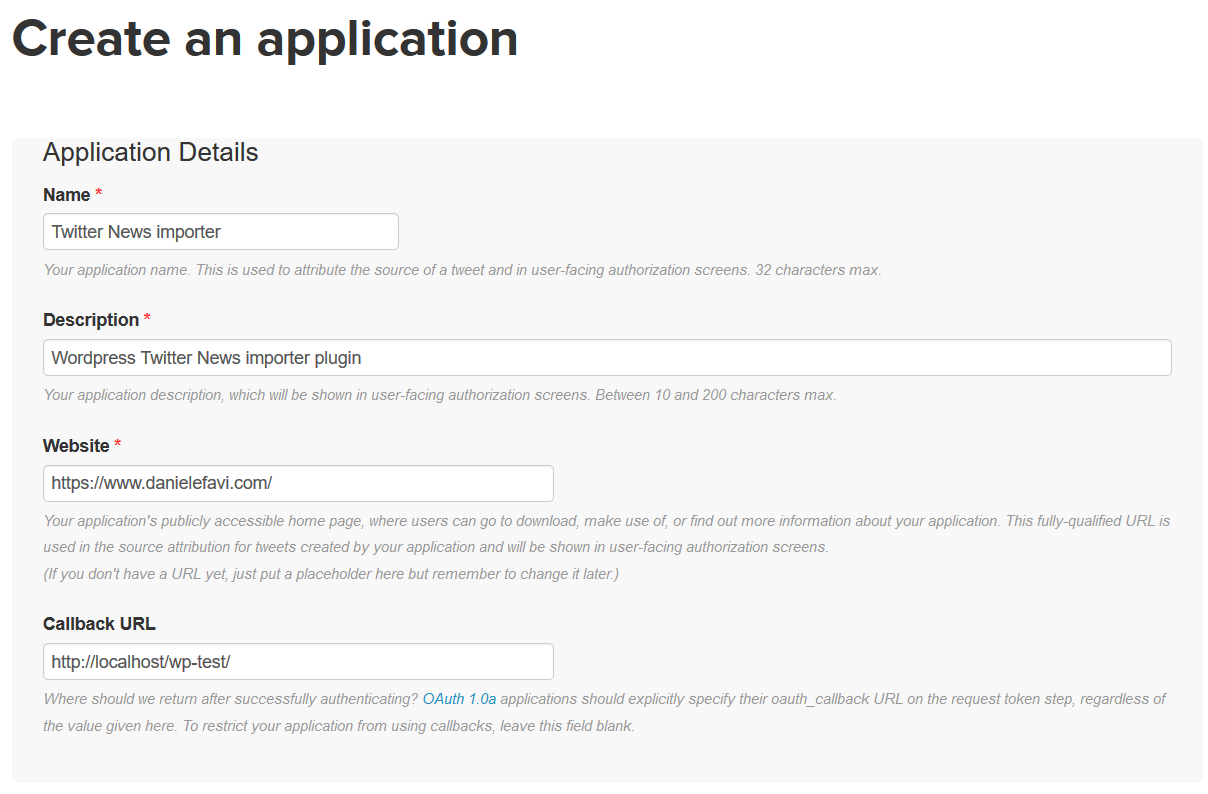
3) Once saved, open the twitter app you have just created and click the tab Keys and Access Tokens; here you will find the API key and API secret.

Twitter settings for WP Social Importer
4) Now open your website and go to the admin panel. Then go to the Social Network Importer plugin page by clicking the link Social Importer on the left menu.
5) On the importer page you will see the box Add new account on the top-right: there from the Select a social network type section choose Twitter from the dropdown menu.
Give a name to this account, fill up the API Key and API Secret with the Twitter web app you have just created; it is important you fill in the field Twitter user (screen name) with a valid name. Then click the button Save Twitter Account

NOTE: if the field Twitter user (screen name) is not correct you will get the error Not Authorized _